THE UK'S LEADING SAME DAY PRINTER!
Bleed and Safe Areas
Understanding bleed and safe areas is essential for professional print results. This guide explains what they are, why they matter, and how to set your artwork up correctly.
What is bleed in printing?
When we print your artwork, it’s produced on large sheets alongside many other designs. These sheets are then trimmed down to the final size using a commercial guillotine.
Trimming isn’t always exact — it can vary by a millimetre or two. Without bleed, this can result in thin white lines appearing around the edge of your design.
Bleed is a small extension of your artwork beyond the final cut size. It ensures your background colours or images reach the edge even after trimming.
How much bleed do I need?
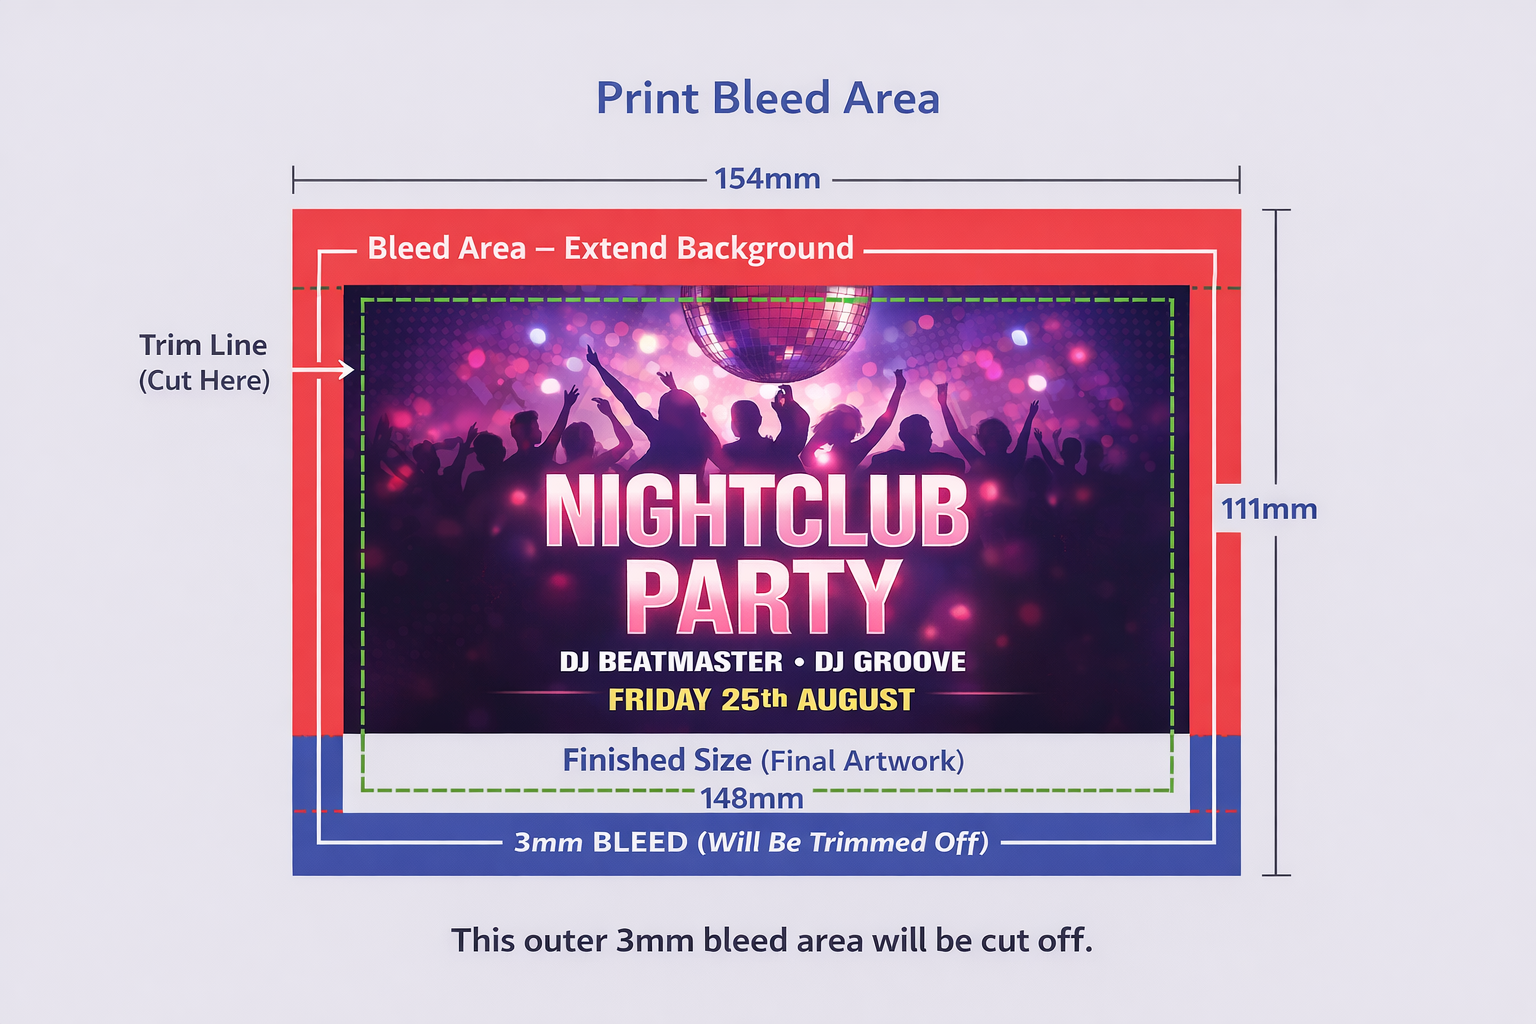
In most cases, we require a 3mm bleed on all sides of your artwork.
Example:
If your finished size is 148 × 105mm (A6), your artwork file should be:
- Finished size: 148 × 105mm
- With bleed: 154 × 111mm
Any background colours or images must extend fully into this bleed area.
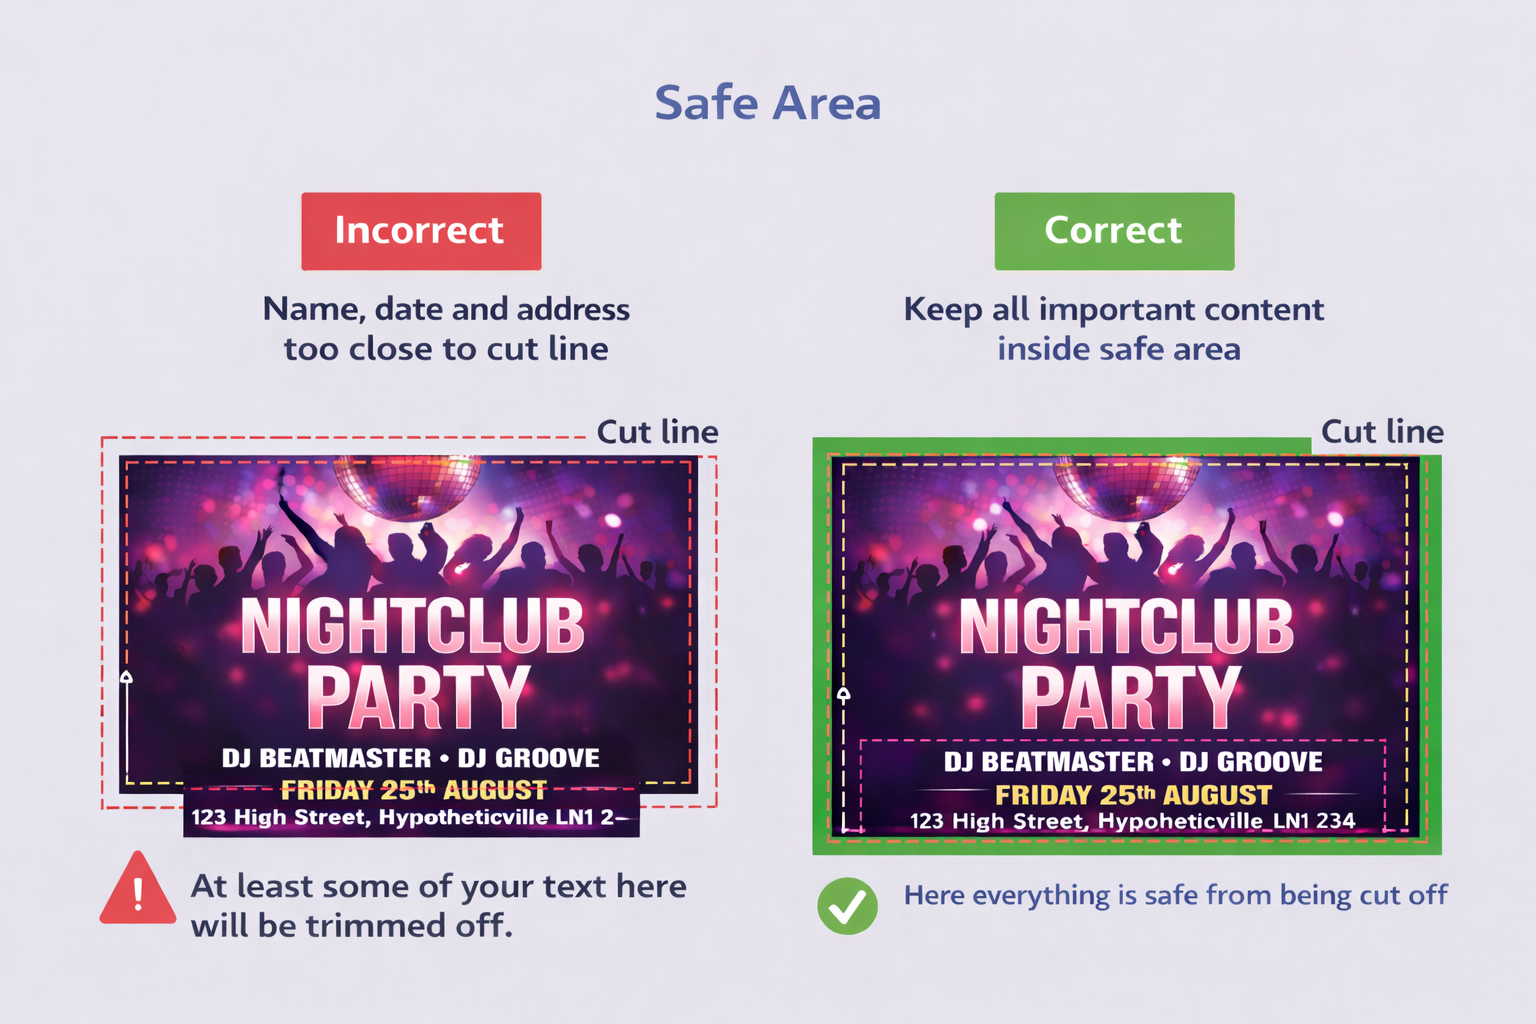
What is the safe area?
The safe area is the opposite of bleed — it’s the space inside the cut line.
We recommend keeping all important content (text, logos, contact details) at least 3mm inside the final trimmed edge.
This ensures nothing important is accidentally trimmed off during finishing.
Do I need crop marks?
Crop marks are not required. As long as your artwork is supplied at the correct size with bleed, we can set it up accurately for print.
If you’re an experienced designer, you’re welcome to include crop marks — but they’re completely optional.
Visual examples
These diagrams show how bleed, trim, and safe areas work together.
Key areas explained
- Bleed area: The outer 3mm border that gets trimmed away
- Cut line: Where the guillotine trims the product
- Safe area: Inner margin where important content should stay