THE UK'S LEADING SAME DAY PRINTER!
Artwork Guide
Everything you need to prepare your artwork for print.
Files, images & colour
File Format & Resolution
Your artwork should be supplied as a print-ready file. We strongly recommend providing a high-resolution PDF, as this produces the best and most reliable print results. We can also accept JPEG and PNG files, provided they are high resolution.
When we say high resolution, we recommend 300dpi minimum. It is important to understand that the images used within your design must also be high quality from the beginning. Simply saving a design as "high resolution" will not improve poor-quality images. If a low-resolution image is used, it will always print looking pixelated, blurry or grainy.
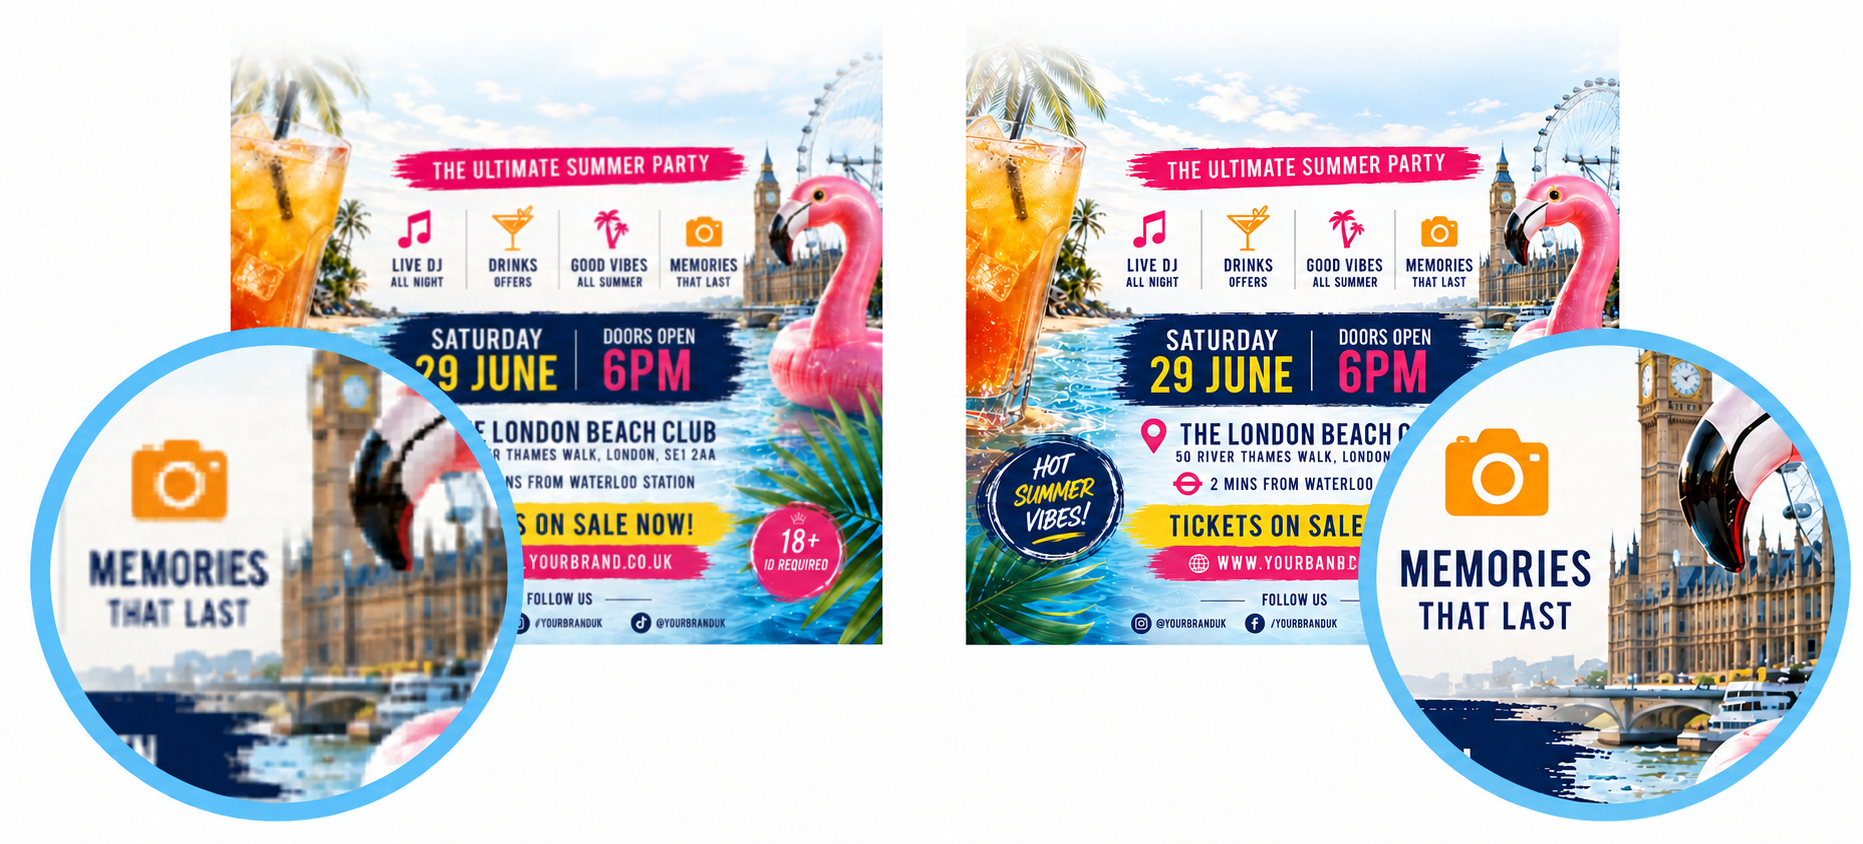
A simple way to check your artwork quality is to open the file and zoom in to approximately 400%. If images or text begin appearing pixelated or grainy at this stage, the artwork is likely too low in resolution for professional print results.
Colours
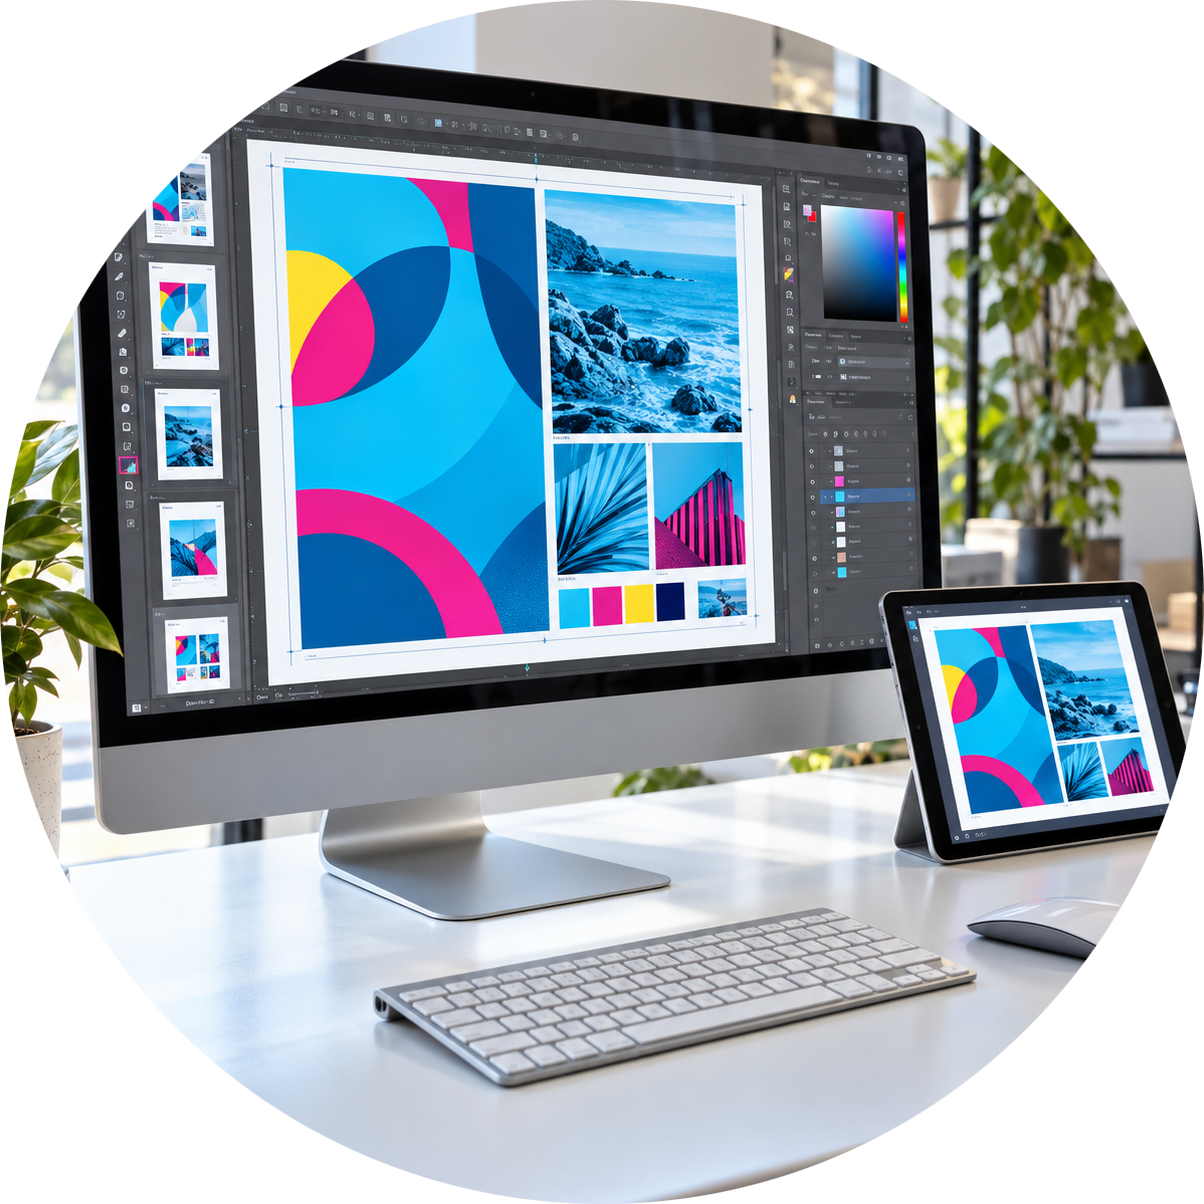
For professional printing, artwork should ideally be supplied in CMYK colour format.
CMYK stands for:
- Cyan
- Magenta
- Yellow
- Black
These are the four ink colours used in commercial printing.
Computer screens, phones and tablets display colours using RGB, which uses light and therefore appears brighter and more vibrant than print.
Because of this, printed colours will naturally appear slightly different from what you see on screen. We can accept RGB artwork; however, it will automatically be converted to CMYK before printing. During this conversion, certain colours can become less vibrant.
Customers sometimes ask:
"Why do my printed colours look dull compared to my screen?"
This is usually caused by RGB artwork being converted to CMYK.
This effect is particularly noticeable with:
- Bright greens
- Vivid oranges
- Fluorescent colours
- Highly saturated tones
Using AI-Generated Artwork for Printing
AI is a great way to create professional-looking designs, images and layouts, especially for customers who do not have access to design software or a graphic designer. However, AI does not always produce files that meet the recommended technical standards for professional printing. This is a well-known issue across the printing industry and is not specific to our printing process.
Most AI-generated artwork is not created at the recommended resolution of 300dpi. AI also commonly positions text, logos and other important details too close to the edge, without the recommended 3mm safe area. This means important content could be trimmed off or appear very close to the edge of the finished product.
Artwork may look clear on a phone or computer screen but appear slightly softer, blurred or pixelated when printed, particularly if it has been enlarged.
We receive a significant number of AI-generated files, and the vast majority of customers are happy with their finished print. We understand that the AI-generated file may be the best version available to you, so provided the artwork is clear, legible and you are happy with the online proof, we will print it as supplied.
AI-generated artwork now accounts for a large proportion of the orders we receive. If we stopped and questioned every AI-generated file that did not fully meet professional artwork standards, a large number of orders would be placed on hold. This would cause significant delays and would not be commercially practical.
As everyone has different expectations of print quality, we cannot guarantee or give a subjective opinion on how satisfied you will be with the finished result. Use the prompt below and follow the checklist for the best results.
Here is a prompt you can try copying and pasting into your AI to get the best results:
“Create a design for commercial print at (enter size of the product e.g. A5 210mm × 148mm), all images must be 300dpi and keep all text, logos and QR codes well away from the edge of the design - at least 3mm from the edge of the design.”
Checklist
- Create the artwork as close as possible to the final printed size
- Supply it at 300dpi wherever possible
- Avoid enlarging small AI-generated images
- Download the proof and inspect it at 100%
- Zoom in closely to check faces, logos and other detailed areas
- Make sure the image remains clear and does not break into visible pixels
Zooming in does not confirm the exact DPI of a file, but it is a useful way to identify poor-quality or low-resolution images before printing.
Increasing the DPI setting after creating an image will not necessarily improve its quality. It may simply make the file larger without adding any additional detail.
Bleed, edges & safe areas
What is bleed in printing?
When we print your artwork, it is produced on large sheets and then trimmed to the finished size using a commercial guillotine.
Trimming can vary by approximately 1-2mm (this is industry standard). If the background stops exactly at the finished size, this movement could leave thin white lines around the edge.
Bleed prevents this by extending background colours and images beyond the final cut line.
How much bleed do I need?
Ideally, artwork should include 3mm bleed on every side.
For example, if the finished size is 148 × 105mm (A6), the artwork size including bleed should be:
- Finished size: 148 × 105mm
- Artwork size with bleed: 154 × 111mm
Any background colours or images intended to reach the edge must extend fully into the bleed area.
What if my artwork doesn’t have bleed?
Don’t worry—we can still accept artwork without bleed.
If bleed hasn’t been included, our system can create a synthetic bleed by extending and stretching the pixels at the very edge of your artwork into the required bleed area.
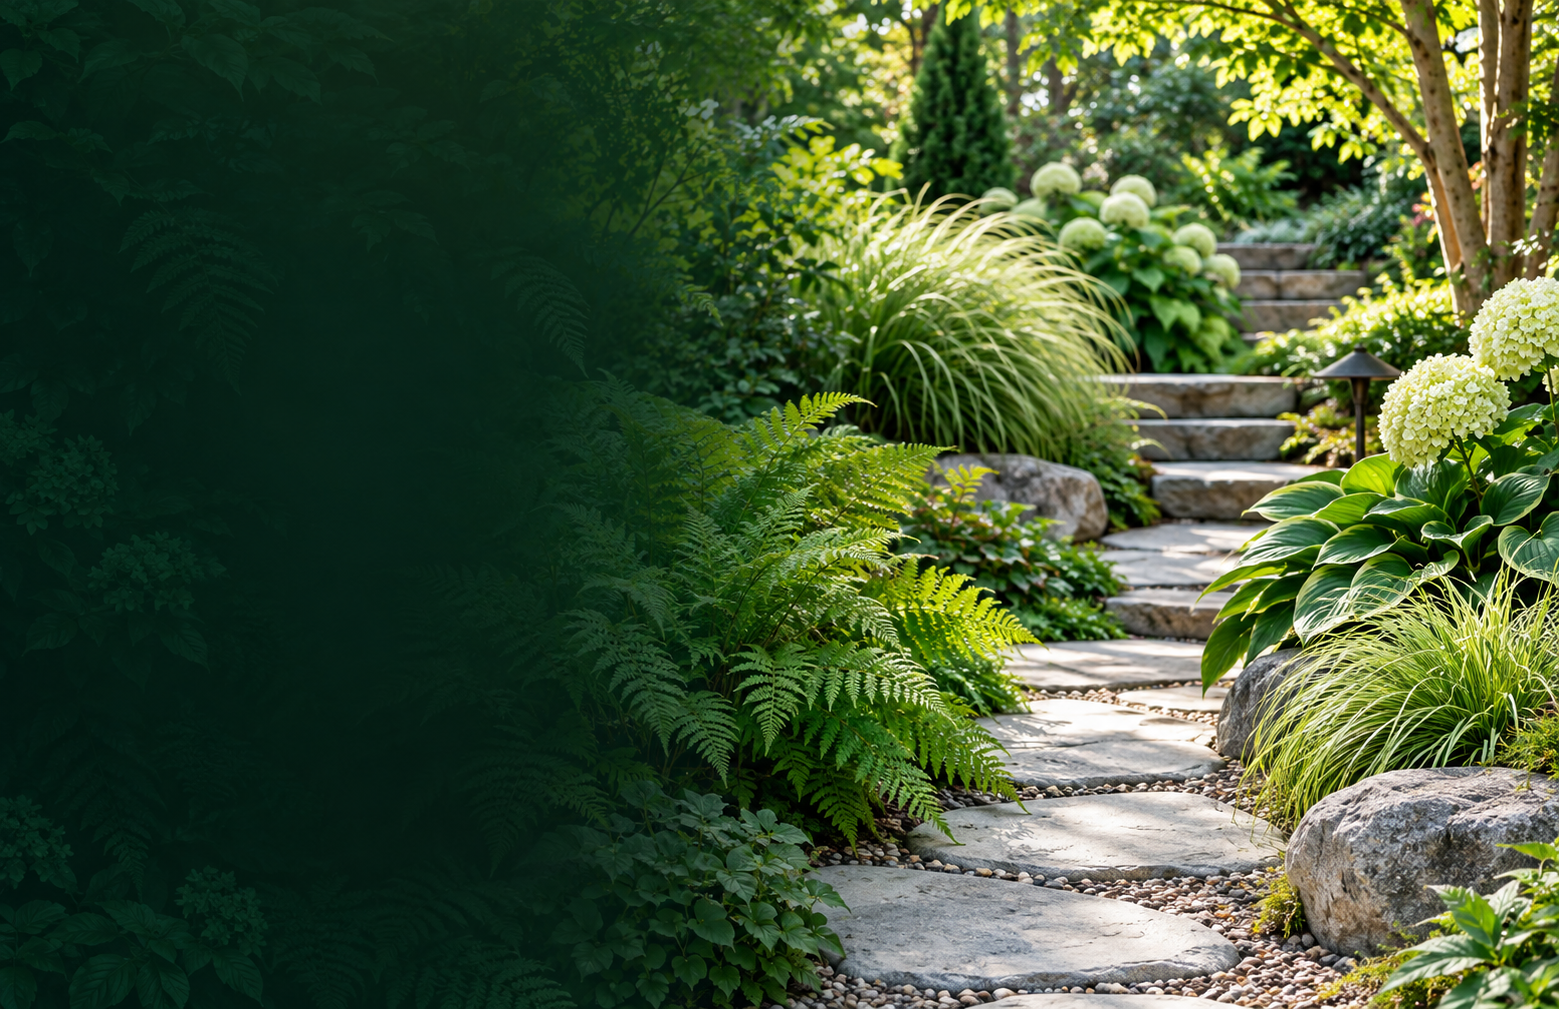
For us to add synthetic bleed successfully, the background colour or image must reach the exact edge of the artwork. There must not be any thin white lines or slithers around any of the edges.
If white edges are already present in the supplied file, our system will extend those white pixels instead. This means we cannot create a suitable bleed, and white edges may appear on the finished printed product.
Synthetic bleed works well for most backgrounds and images. However, it may be noticeable if your artwork contains borders, text, logos, faces or detailed elements very close to the edge. For the best result, we always recommend supplying artwork with a proper 3mm bleed wherever possible.
Supplied artwork — no bleed
✕ White slither
✓ Background reaches every edge
After synthetic bleed is added
White pixels extend into the left bleed causing a slither.
Background extends on all four sides.
The area outside the line is the synthetic bleed.
Safe Area
We require a 3mm safe area, which is industry standard.
Important content such as:
- Text
- Logos
- QR codes
- Contact details
- Important graphics
should remain at least 3mm away from the finished trim edge.
This does not mean your design requires a border.
Background images and colours can still extend to the edge and into the bleed area.
The safe area exists to protect important content from being accidentally trimmed during finishing.
Anything placed within this area is at risk.
The red line around the edge of the proof is where we cut the edge.
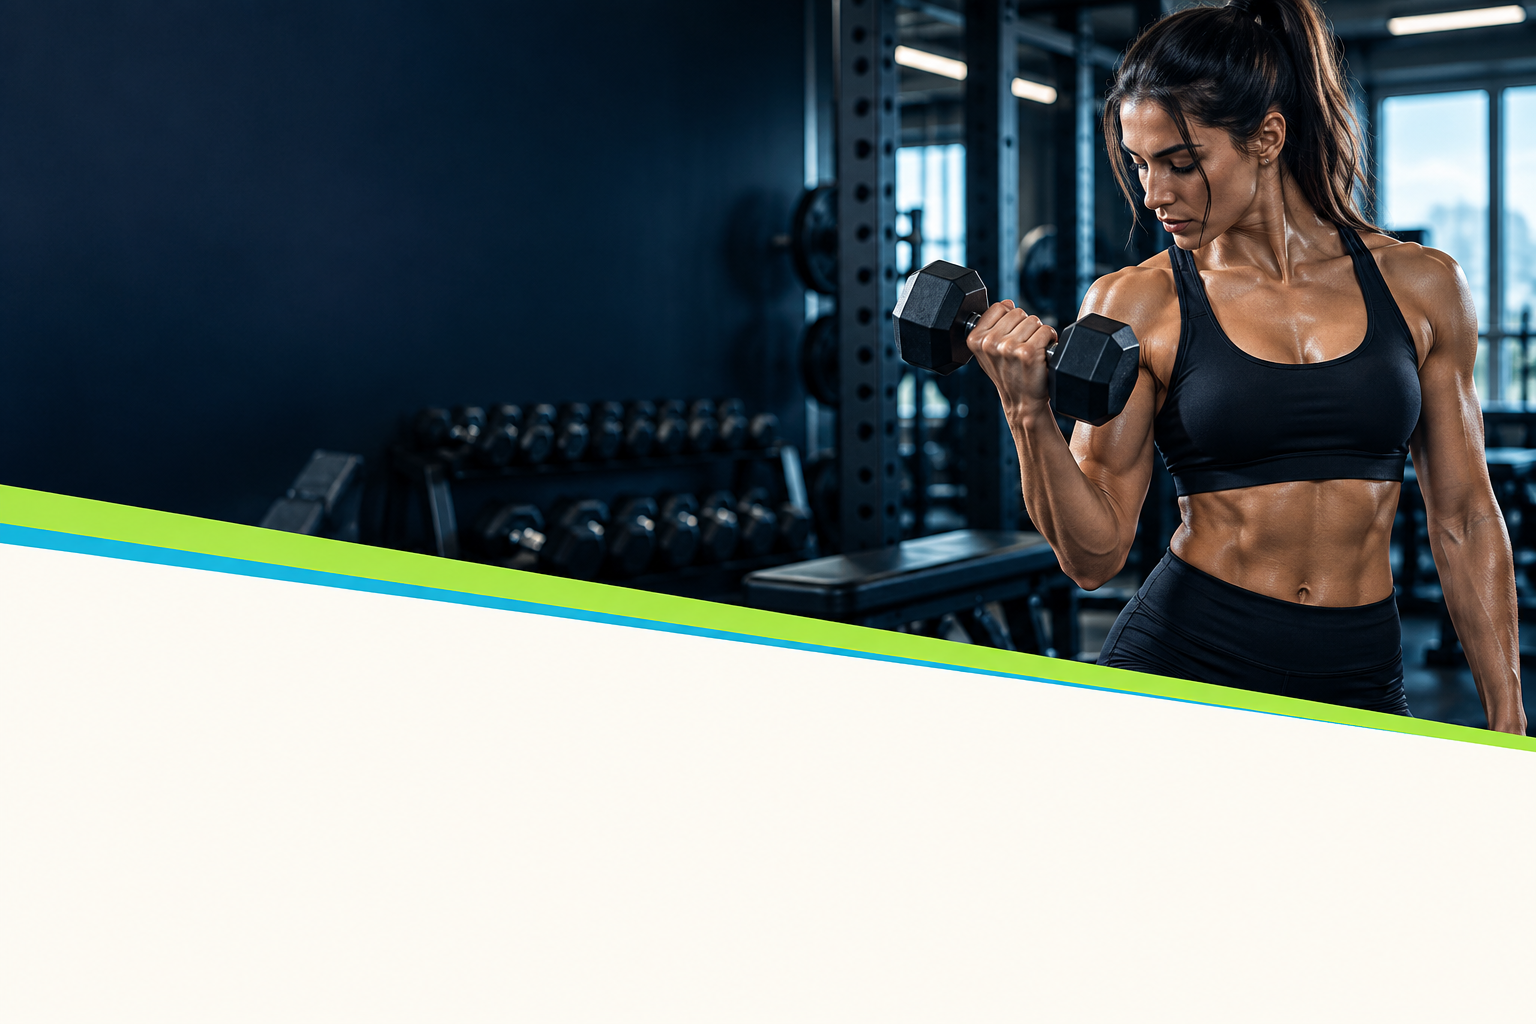
Text too close to the edge
 GET
GETFIT.
Venue address is cropped.
Correct safe area
GETFIT.
Address at least 3mm inside.
Borders
We recommend avoiding borders positioned close to the edge of your artwork.
This relates to the same principles as the safe area. During the finishing process there is an industry-standard trimming tolerance of approximately 1–2mm. If a border sits very close to the edge of the product, even a small movement within this tolerance can cause it to appear uneven, making one side look thicker or closer to the edge than the opposite side. For the best results, we recommend avoiding fine borders around the outer edge of your design where possible.
✕ Border too close
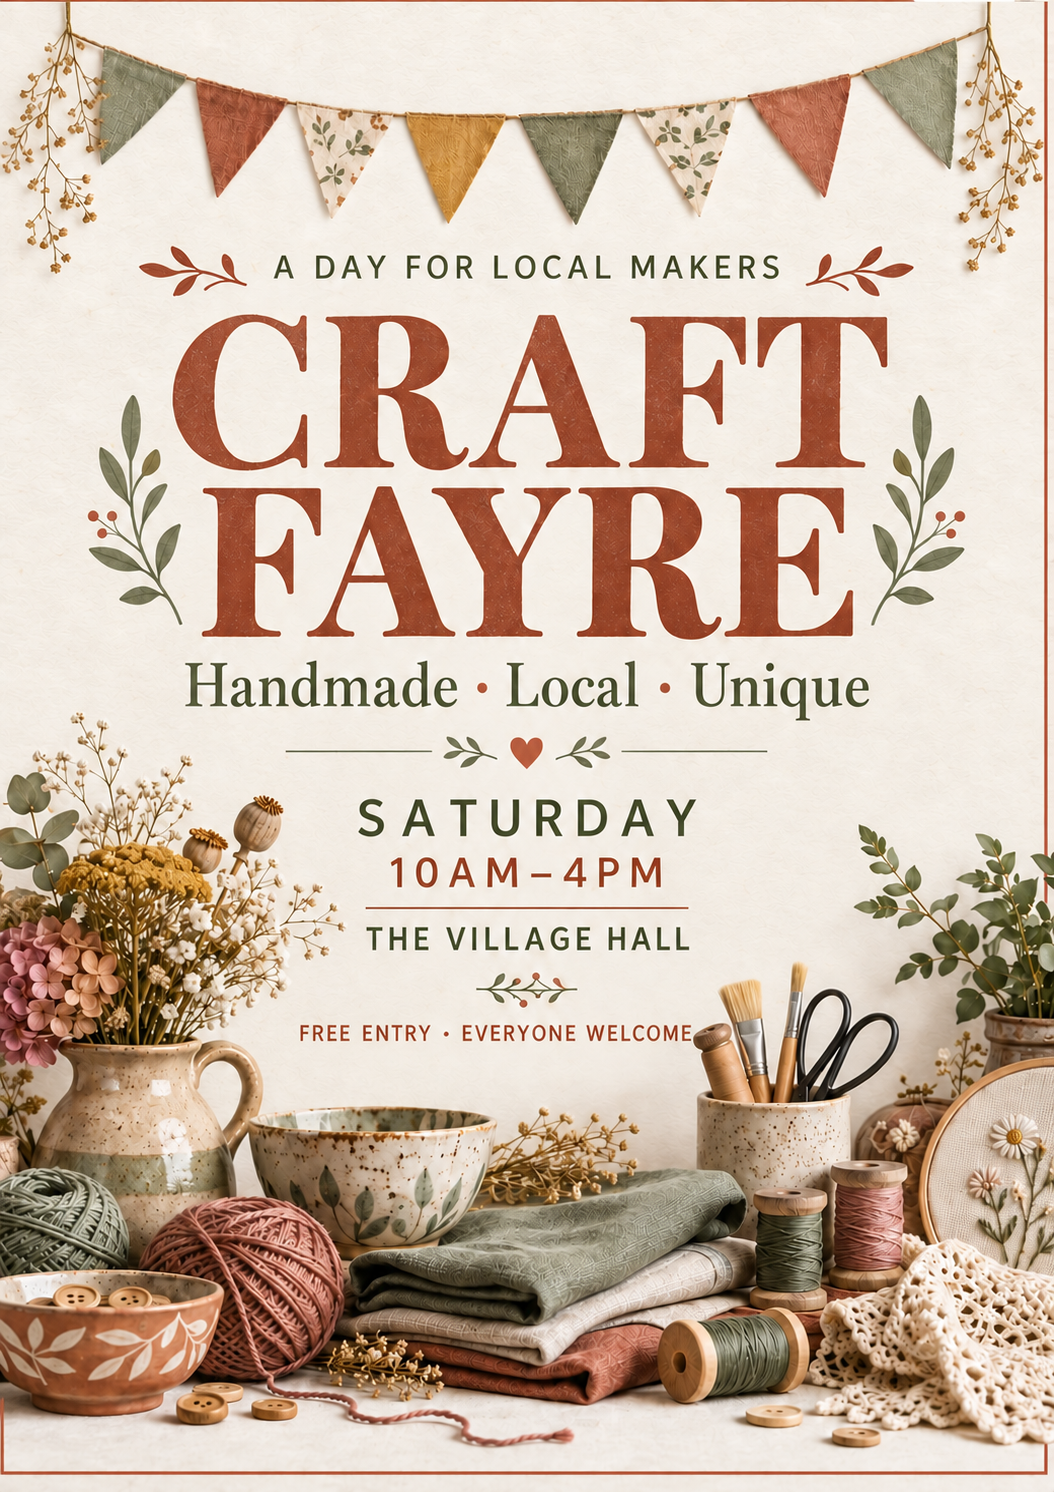
Border clipped unevenly after trimming.
✓ Border safely inset
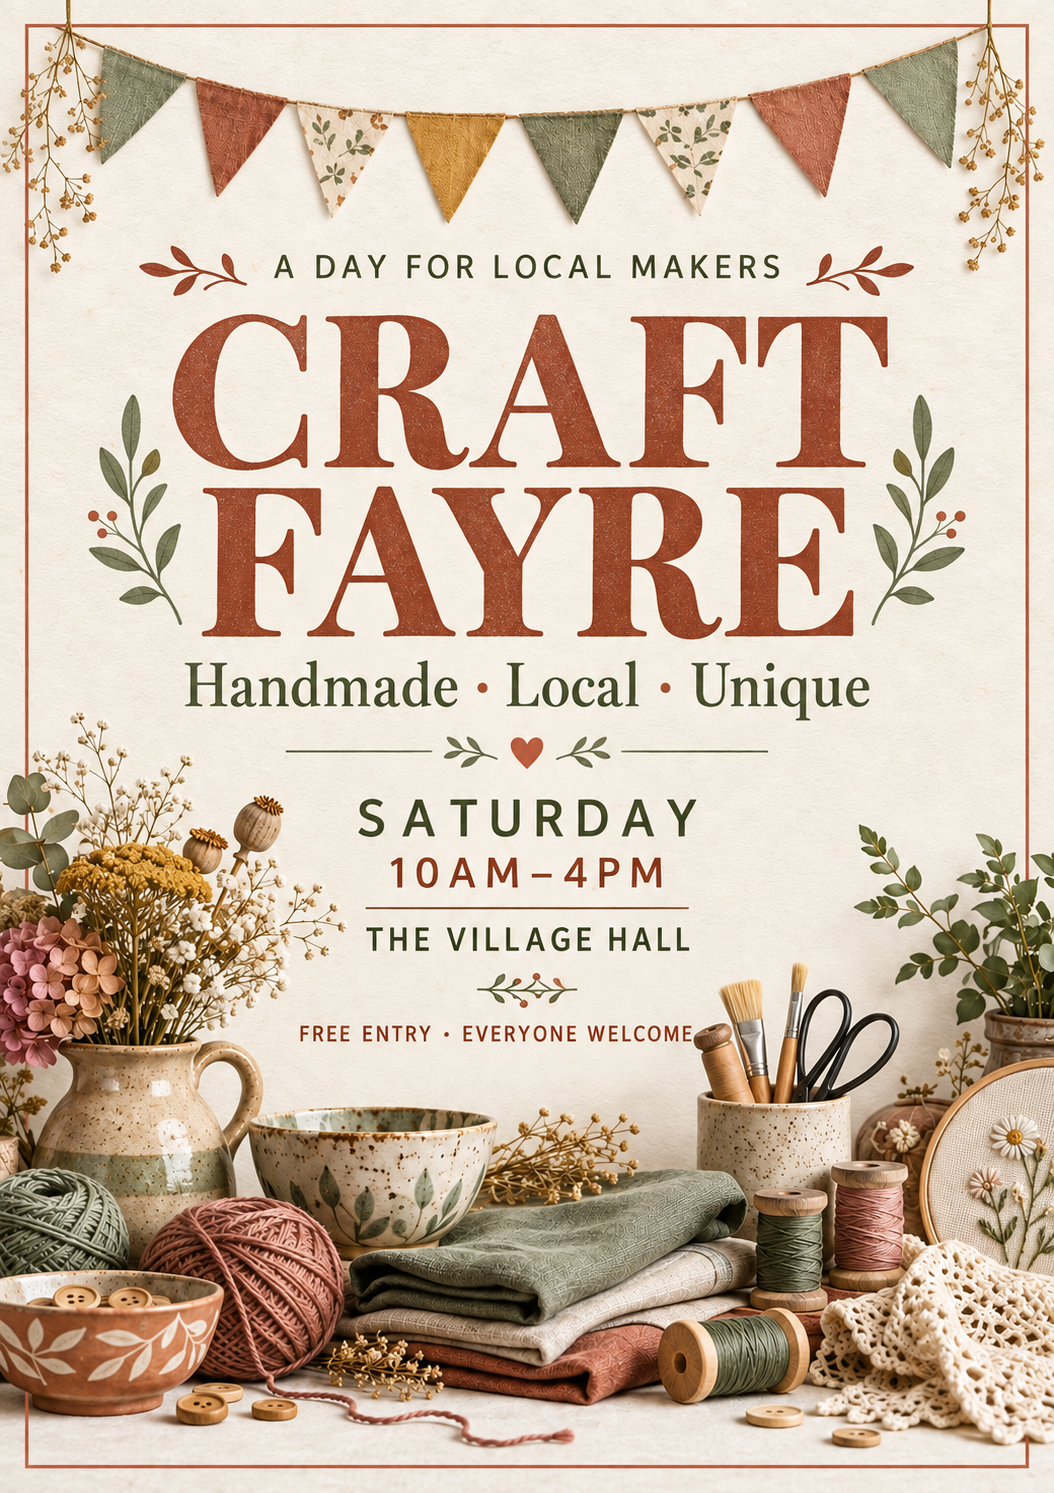
Border inside the safe area, even after trimming.
Trim Box
When supplying a print-ready PDF, please include a trim box wherever possible.
The trim box tells our system the intended finished size of the product and where the artwork should be trimmed. This helps ensure your artwork is sized and positioned correctly during production.
A trim box is not a visible box, border or cut line on your design. It is information stored in the background of the PDF and will not appear on the printed product.
Most professional design software automatically adds a trim box when exporting a print-ready PDF. If you are using Adobe InDesign, Illustrator or similar software, select the correct PDF export settings and enable “Use Document Bleed Settings” where applicable.
If you cannot add a trim box, don’t worry. Our software can usually detect the page size and process the file correctly. However, including a trim box is always recommended because it gives our system clear information about the intended finished size and reduces the risk of sizing or positioning issues.
Crop marks are not required to create a trim box. If you include crop marks, please check that they do not appear within the finished area on your online proof, as anything visible on the approved proof will be printed.
PDF setup & checks
Crop Marks
Adding crop marks is not required.
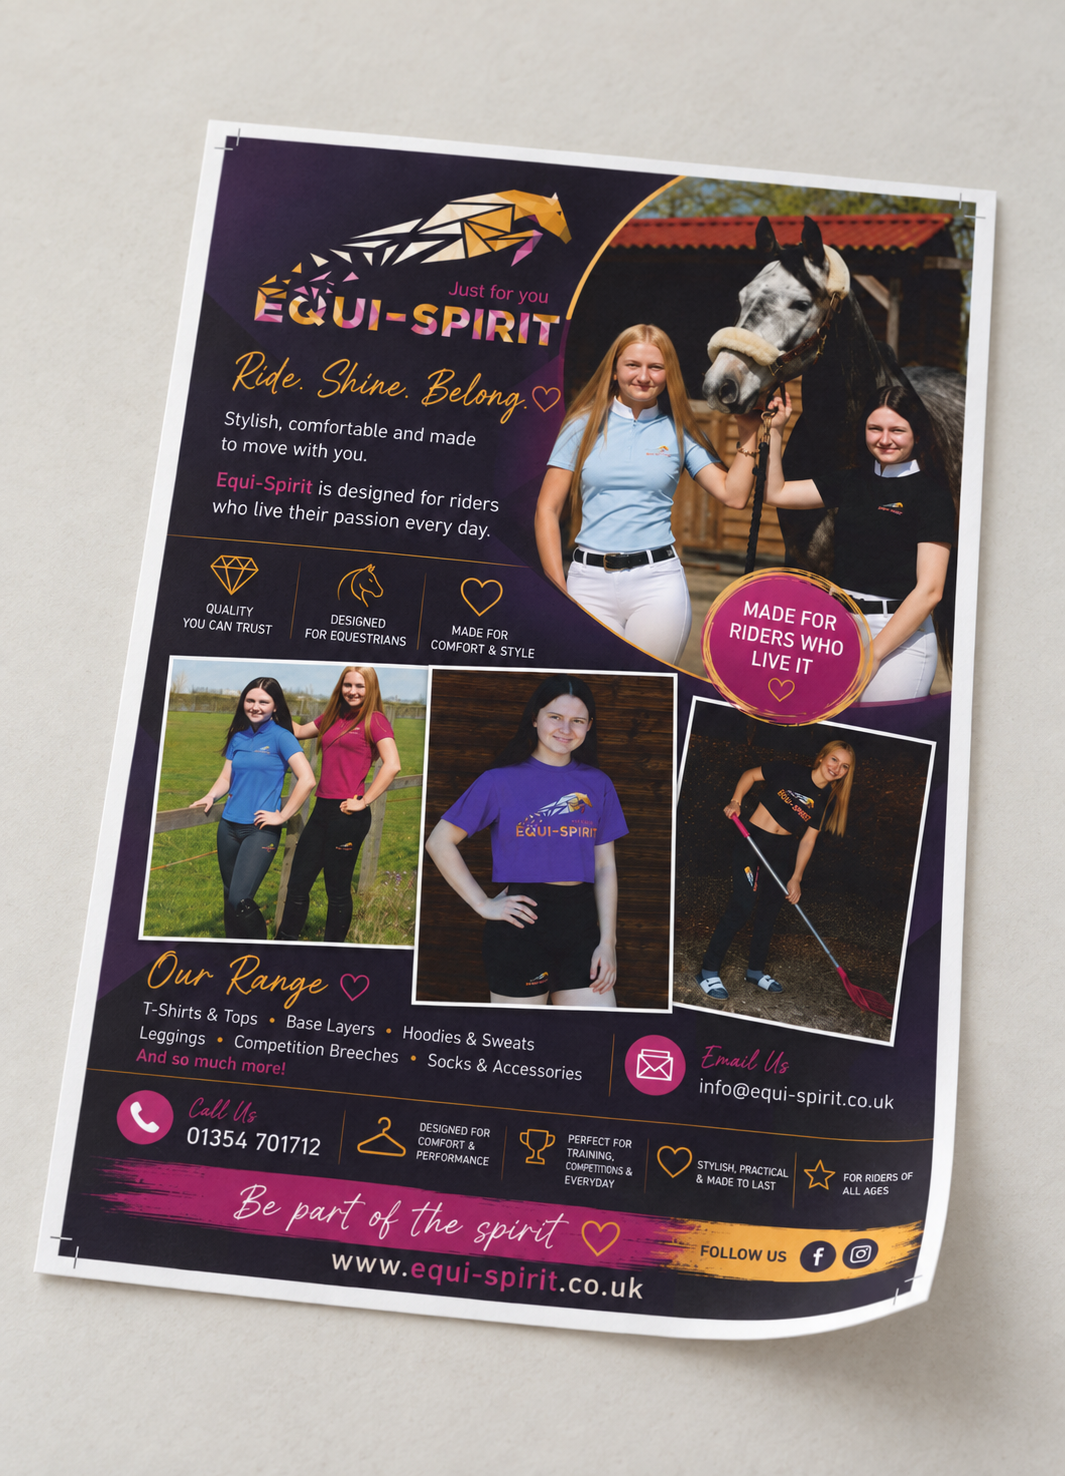
If you are experienced in preparing artwork for print, correctly positioned crop marks can help align your design and speed up production. Please be careful if supplying crop marks, particularly with JPEG or PNG files.
We occasionally receive files where crop marks have accidentally become part of the artwork itself rather than sitting outside the trimmed area. If you see trim marks on the proof then these will appear on your final printed product.
Fonts
Please ensure all fonts are:
- Embedded
- Converted to outlines
If fonts are missing, substituted or unsupported, your text may change appearance and not print as intended. This will usually appear on your proof, so please carefully check all text before approving.
What are transparencies?
Transparencies are design effects that allow objects underneath to show through. They are commonly used for shadows, fades, semi-transparent colours, overlays and glow effects.
Transparency effects are flattened when artwork is processed for printing. This combines transparent elements into the finished artwork so they can be printed correctly.
Lines or “artifacts” on your proof
Occasionally, thin white lines or other marks may appear on the online proof where transparent elements have been flattened. These are usually screen-rendering artifacts caused by the software displaying separate parts of the artwork next to each other—they are not normally present in the actual artwork and will not print on the finished product.
If you notice these lines, download the proof and zoom in as far as possible. Screen artifacts will usually disappear when you zoom in, or remain extremely thin without becoming wider. This confirms that they are only a display issue and will not print.
If a line becomes wider or remains clearly visible when fully zoomed in, it may be part of the artwork. In this case, do not approve the proof and contact us so we can check it.
Example: thin display artifacts
Fine white lines show the joins between sections.
Magnified detail
Close-up of the original hairlines, without enhancement.
Leaflets, booklets & banners
Half Fold Leaflets
Half-fold artwork can be supplied in two ways:
Option 1: Supply as paginated flat pages (e.g. A4 folded to A5: front cover right / back cover left on page 1, inside pages on page 2).
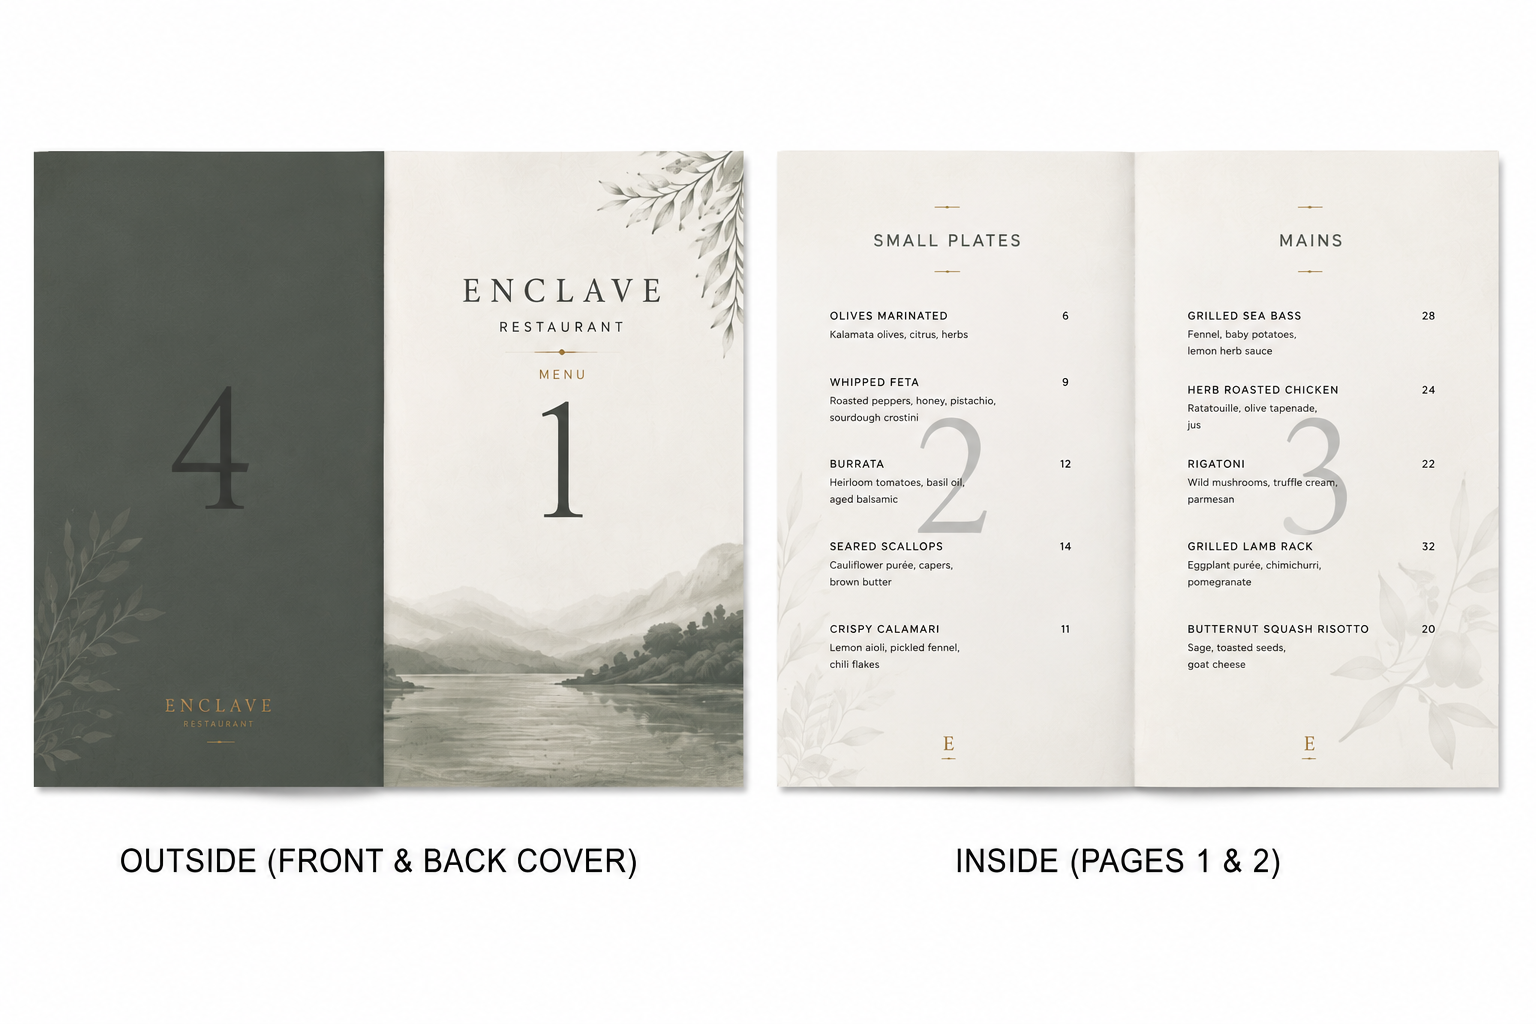
Option 2: Supply a print-ready 4-page PDF in reading order and our system will automatically impose it for print.
Please note: automatic imposition only works with a complete 4-page PDF.
Folded Leaflets (6 or 8 Panel)
For products with multiple panels, panel sizing is extremely important.
For example:
An A4 folded into 3 panels (6pp) should have panel widths of 99mm each.
Incorrect panel widths can cause poor folding alignment and uneven finished panels.
Please ensure fold panels are set up accurately within your design.
These must be supplied at the unfinished size as paginated flat pages – so an A4 folded into DL panels should be supplied as 2 pages of A4.
Stapled Booklets
Booklets should be supplied as single pages in reading order.
Example:
A 12-page booklet should be:
- One PDF file containing all 12 pages in the correct order – not 12 separate PDF files
Page 1 should always be the front cover.
Please do not supply booklet spreads with pages side by side. We need them as pages, not spreads.
Our workflow automatically imposes pages ready for print.
Orientation
When uploading folded leaflets or landscape double-sided products, please upload the artwork in the correct orientation.
Landscape artwork should be uploaded as landscape.
Uploading rotated portrait artwork can cause the reverse side to print upside down.
Banner artwork
Please ensure banners are designed at full finished size. A common mistake is creating a smaller design and enlarging it later. Enlarging artwork reduces effective resolution and can result in pixelated images and text.
Be very careful if using AI, as we usually find the resolution is too pixelated to be enlarged.
File Assist & proof approval
 What Is Included In Our File Assist Service?
Our File Assist service is ideal for customers without a graphic design background.
Rather than your file entering our automated workflow immediately, a member of our team will carry out a manual check.
We can:
- ✔ Check artwork size
- ✔ Ensure text appears legible
- ✔ Add bleed where possible
- ✔ Upload files on your behalf if needed
- ✔ Notify you if the wrong product size has been ordered
Please note:
File Assist does not include:
- ✖ Proof reading content
- ✖ Checking spelling or grammar
- ✖ Verifying QR codes
- ✖ Full image resolution checks
- ✖ Checking page orientation
- ✖ Fold accuracy validation
- ✖ Content accuracy checks
- ✖ Checking that text does not go off the edge
File Assist is charged per file, per check.
If you are ordering multiple products, you will need File Assist for each product. If you only pay for one File Assist, we will only check the first product.
Approving your proof
We recommend downloading the proof so you can check it properly and zoom in where needed. We do not recommend trying to approve a proof on a phone because of how small it would be displayed.
Here are a few reminders to check:
- Text is not too close to the edge
- No crop marks are showing
- Artwork is not too pixelated when you zoom in
- No white edges (slithers) are inside the red cut line – zoom in so you can check all edges
Need Help?
Following these guidelines ensures that there will be no delays with your printing. If you have any problem, please don't hesitate to call our team on 0116 287 7989 who will be more than willing to help.